Pages

Thursday, November 21, 2013


Art Club Project


Students in Art Club melted records into the shape of bowls and plates using metal nesting bowls to shape them.    
We turned our oven on and preheated it to 200 degrees, once the oven was heated we took the smaller bowl of the two, turned it upside down and placed the record on top of it.  
We then placed the bowl and the record in the oven and watched it for three minutes.  
Once the edges of the record started to sag, pull the rack out, place the large bowl on top of the record pressing down to form the bowl. 
 Take the record out of the oven and let cool for 2 minutes. To create a flatter plate, use pie pans  to get the shape you want. 
Here are some examples of the fine work the Art students did!!!


Tip

Something I use in my art room which is unconventional are some cheap
toothbrush holders. I use toothbrush holders to store water when we do watercolor or sometimes painting. It helps the younger students spill less water when they are rinsing their brushes out.  They have lids that pop off when you need to refill the water inside the cup, and afterwards I use the cups to store the brushes making sure the bristles are facing up for the next use.  


Wednesday, November 20, 2013

 Tape Sculptures

For this project, the students talked about why artist are inspired to copy things that they see  all the time.  One artist would be Andy Warhol, he is an artist who took a very common item and created many works of art around that item like the cambells soup can.
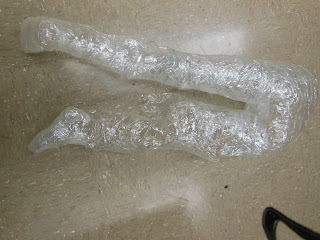
We also took a very common item that we see everyday and created an in-the-round sculpture using packing tape.  Here are a few pics of what we are working on.


We stuff our sculptures with scrap paper, that I save after all the projects.
I never throw away anything!!!!!


Saturday, November 16, 2013

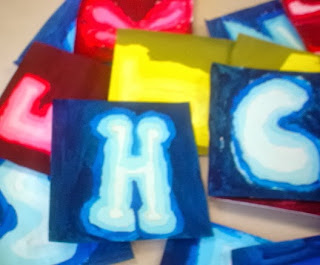
4th Grade Value Scale Letters

 Students cover what a value scale is and learn about tints and shades.  I  like to work with my students as they do their project so they know what to expect when their painting.
Step 1. Draw your letter on you paper making sure to make the letter large enough to paint inside of it.
Step 2. Pick the color you plan on using for your value scale and with that color paint over the line you drew to create your letter.
Step 3. Tints, in a small bowl or palette add a little white to the paint you have chosen  and paint inside the letter, do this again by adding a little more white, to create two layers and to achieve a lighter shade.
Step 4. Shade, wash your bowl and add a little bit of black plus a color to create your first shade. Paint this around the outside of the letter and repeat on more time by adding a little more black.


Wednesday, November 13, 2013

Tuesday, November 12, 2013

Art Club Project!!!!!!


Mason Jar Tumblers
You can use any kind of jar you want.

When you paint the jar it's easier to put your hand inside the jar so you can rotate the jar without touching the paint!

You will need a jar, straw, grommet, stippling brushes, glass paint, and a drill for this project.


You can use Martha Stewart Glass Paint to paint your mason jar, if you are doing an ombre effect like we chose to do, use a stippling brush to blend the colors together.  Once you have painted your jar and let it dry, bake the jar at 350 degrees for 30 minutes.  If you have thicker layers on your jar, you might have to let it bake longer.  While your waiting drill a hole in your lid and slide a grommet in for the fit.  Add a fun Straw and your set!!

Half Self-Portraits


These are the portraits I did with my Fifth grade art class at the beginning of the school year.  The students loved them, they had a chance to be creative and fold their paper and design their own name on the side of the portrait.  The lesson gives the students the chance to really see how to create a face with good proportions.  Give it a try!!


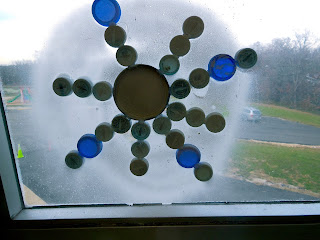
Bottle Cap Snowflakes

If you have extra bottle caps in your art room, use them to create snowflakes in the windows of the school.  There easy to make, I let my students  make one when they are done with their work.  All we used was a glue gun and donated bottle caps.  The see through lids give a really nice effect!!


I used the Sprayable Snow and had the students spray in a circle over their snowflakes!!